Imagine you’re in an emergency—someone collapses, stops breathing, and you’re the only one around with a bag mask device. What do you do? How do you ensure they receive enough oxygen without causing harm? Bag-mask ventilation (BMV) is a crucial skill in emergency medicine, used by paramedics, nurses, doctors, and first responders. If done correctly, it can save lives. If done incorrectly, it can lead to complications like inadequate ventilation, stomach inflation, or even aspiration. In this guide, we’ll break down how to properly deliver breaths using a bag-mask device, discuss common mistakes, and share pro tips on how are breaths delivered using a bag mask device.
What Is a Bag-Mask Device?
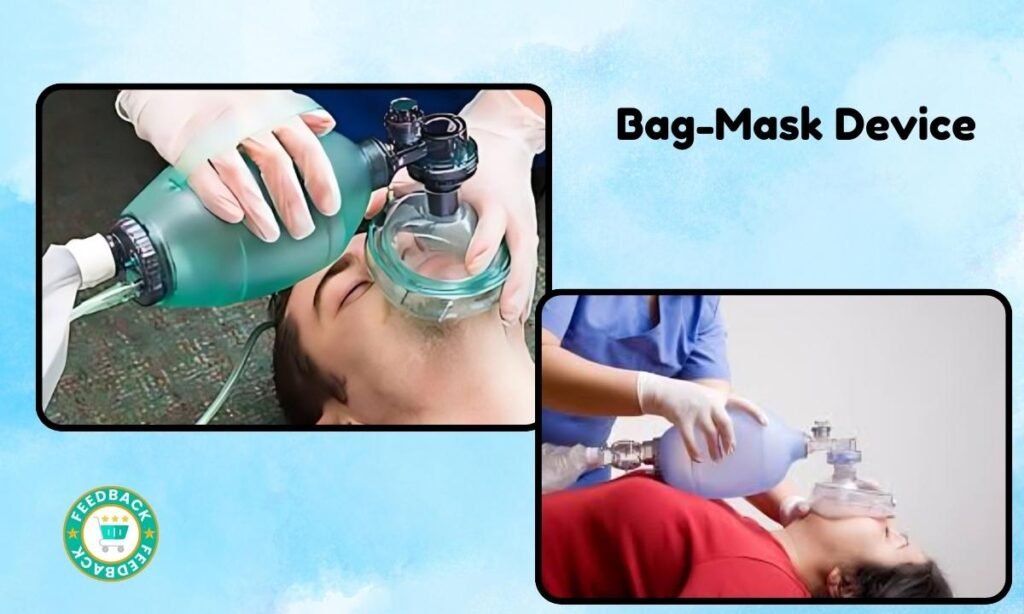
A bag-mask device (or bag-valve mask, BVM) is a hand-held tool used to provide positive pressure ventilation to patients who are not breathing or are breathing inadequately. It consists of:
- A self-expanding bag – when squeezed, it pushes air or oxygen into the patient’s lungs.
- A one-way valve – ensures air moves in one direction.
- A face mask – creates a seal over the nose and mouth.
- An oxygen reservoir (optional) – helps deliver a higher concentration of oxygen.
How are Breaths Delivered Using a Bag Mask Device?
Listed below are some steps to understand about how are breaths delivered using a bag mask device:
Step 1: Positioning the Patient
Proper positioning is the foundation of effective bag-mask ventilation.
- Supine position – Lay the patient flat on their back.
- Head tilt-chin lift (if no spinal injury is suspected) – This opens the airway by lifting the chin and tilting the head back.
- Jaw thrust maneuver (if spinal injury suspected) – Push the jaw forward without tilting the head to protect the spine.
Pro Tip: The ears should be aligned with the sternal notch to optimize airflow.
Step 2: Choosing the Right Mask Size
The mask must fit snugly to prevent air leaks. A good fit:
- Covers the nose and mouth but not the eyes.
- Has a soft seal that molds around the face.
- Doesn’t require excessive force to keep in place.
How to check fit: If air escapes from the sides when you squeeze the bag, the mask might be too big or not positioned properly.
Step 3: Creating a Proper Seal
Now comes the tricky part—ensuring a tight seal so air goes into the lungs and not the stomach.
- Single Rescuer: The E-C Clamp Technique
When you’re alone, use the E-C clamp grip:
- C-shape – Thumb and index finger press down on the mask to create a seal.
- E-shape – Other three fingers grip the jaw to lift it upward.
Common Mistake: Pressing down on the mask too hard can collapse the airway—focus on jaw elevation instead!
Two-Person Technique (More Effective)
If help is available, one rescuer holds the mask with both hands while the other squeezes the bag. This provides a much better seal.
- Both thumbs press down on the mask.
- Fingers pull the jaw up, maintaining an open airway.
Pro Tip: The two-person method is always preferred when possible!
Step 4: Delivering Effective Breaths
Here’s where precision matters. Delivering too much or too little air can have serious consequences.
Ventilation Rate
- Adults: 10-12 breaths per minute (every 5-6 seconds).
- Children: 12-20 breaths per minute (every 3-5 seconds).
- Newborns: 40-60 breaths per minute.
- How to Squeeze the Bag
- Gently squeeze the bag over 1 second until you see visible chest rise.
- Avoid forceful squeezing—this can push air into the stomach, leading to aspiration or vomiting.
Common Mistake: Over-ventilating (too fast or too forceful) increases the risk of lung injury and gastric inflation.
Step 5: Monitoring Oxygenation and Effectiveness
Bag-mask ventilation isn’t just about squeezing air in—it’s about ensuring oxygen is reaching the lungs. Signs of effective ventilation include:
- Visible chest rise with each breath
- Improvement in skin color (less blue, more pink)
- Improved oxygen saturation (if monitoring is available)
- Presence of breath sounds on auscultation
If chest rise is not visible, check for:
- Airway obstruction (reposition the head).
- A poor seal (adjust mask position).
- Blocked airway due to secretions (consider suctioning).
Common Pitfalls and How to Avoid Them
- Over-Ventilating – Too much air can cause barotrauma (lung injury) or push air into the stomach, increasing aspiration risk.
- Poor Mask Seal – Leads to inadequate ventilation. Reposition the mask and use the two-person technique if possible.
- Incorrect Head Position – A blocked airway won’t let air in. Use the head tilt-chin lift or jaw thrust.
- Not Watching Chest Rise – If the chest isn’t moving, air isn’t getting into the lungs.
When to Transition to Advanced Airway Management
If bag-mask ventilation isn’t effective, the next step may include:
- Oropharyngeal airway (OPA) – Keeps the tongue from blocking the airway.
- Nasopharyngeal airway (NPA) – Useful if the patient has an intact gag reflex.
- Endotracheal intubation – If long-term airway support is needed.
Key Takeaway: Bag-mask ventilation is a temporary but lifesaving measure—it’s important to transition to advanced airway techniques if needed.
Conclusion
Bag-mask ventilation is a critical skill in emergency medicine that requires precision, practice, and a thorough understanding of airway management. Proper technique—including correct patient positioning, an adequate mask seal, and controlled ventilation—ensures effective oxygen delivery while minimizing complications such as gastric inflation or aspiration. While the single-rescuer E-C clamp technique can be effective, the two-person method is preferable when resources allow, as it provides a better seal and more efficient ventilation. Additionally, monitoring for chest rise, skin color changes, and breath sounds is essential to assess ventilation effectiveness.
Also Read About –